
See auxi in action
your workflows and save you time!
You have a big presentation coming up for a client, and by this point you are already juggling through a 100+ slide deck, constantly going back and forth to make sure everything looks good.
You might already know PowerPoint well, but there are definitely a few tips and tricks that can help you save several hours if not more. We put together this quick guide to help consultants learn a new tricks so you can focus more on strategy, and less on PowerPoint challenges.
Let's get started.
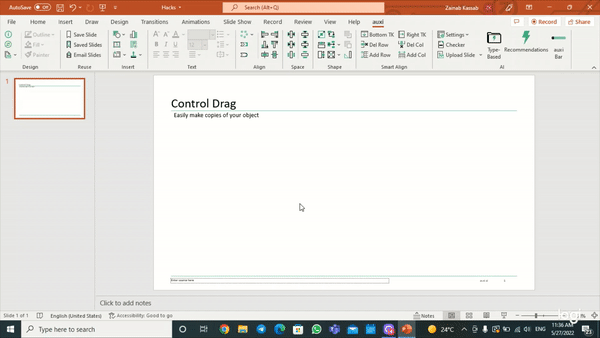
1. Control + Drag to Copy
The conventional way of copying elements within PowerPoint is to hit CTRL C & V. But there is an easier way to go about it - control drag.
On your slide, select an object. When selected, press and hold the CTRL key and drag your element aside.
Result: It creates a copy of your element, and you can repeat it to copy more than one element.
You can select multiple objects as well, and drag them to copy.
2. Shift Drag
You know those times when you wish your elements would move while staying aligned with other elements? This PowerPoint shortcut does exactly that.
On your slide, select an object. When selected, press and hold the SHIFT key and drag your element.
Result: Your element will only move in a straight line, aligned with the other elements. You can drag your elements both horizontally and vertically, without losing alignment.

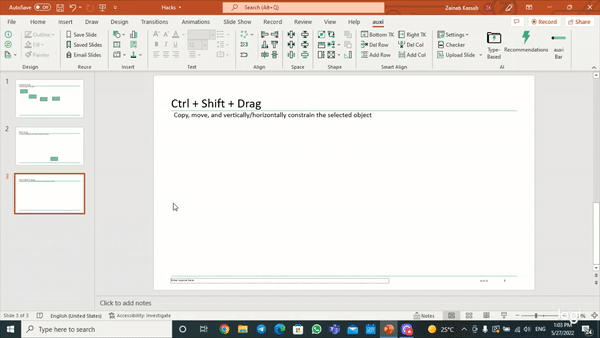
3. SHIFT + CTRL COMBO
Now that you know you can copy your elements easily with the CTRL key and drag them with the SHIFT key, it is time to combine the two for better results!
On your slide, select an object. When selected, press and hold the SHIFT + CTRL keys. Now, drag your element and drop it where you need to.
This way, you can copy your object and ensure movement is only either vertical or horizontal.
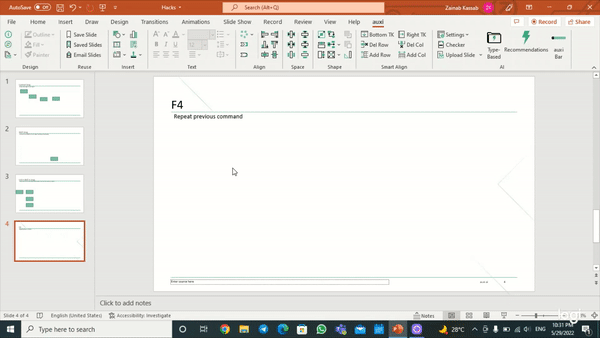
4. The F4 Magic
Now that you've already run a few commands, you might be thinking that you have to do it for every slide - and it is a logical assumption. However, there is a PowerPoint shortcut you will fall in love with.
To repeat your previous command on another element, select the element and press F4.
When fixing several objects, this will save you a lot of time, especially when you want to fix several elements at once.
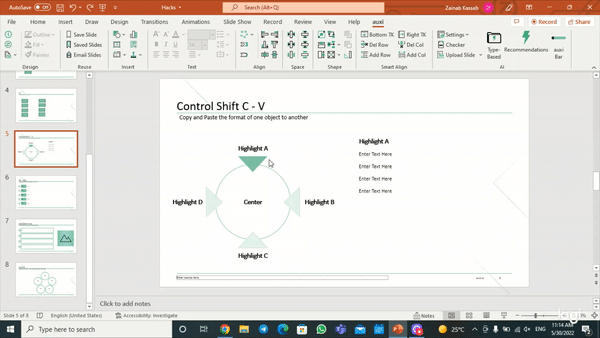
5. CTRL + Shift C – V
Another shortcut we absolutely love is one that helps you format shapes. Now, it is true that you can change the format of multiple objects by double-clicking the Format Painter, however, you still have to pick each element individually.
Here is how you avoid that.
First, SELECT the element which is formatted the way you want and press CTRL + SHIFT + C. This copies your current format!
Next, SELECT the element you want to change the formatting of (you can select multiple elements) and then press CTRL + SHIFT + V.
Now, you have the format you wanted on all your shapes!
So far, these are PowerPoint shortcuts any PowerPoint user can use but things get better with auxi.
auxi is an AI-powered PowerPoint Add-In designed for consultants and investment bankers, hence, there are a few features that not only save you time - they also make you present better.
Let's take a closer look at everything possible with auxi.
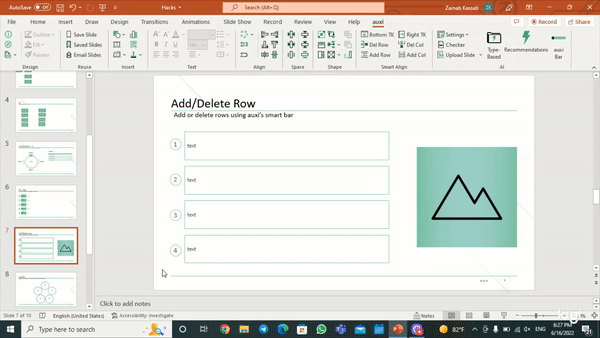
6. Add/Delete Rows or Columns
Adding new rows in PowerPoint can be time consuming, especially when working through 100s of slides. You need to make space for new ones, move elements, insert and then try to evenly distribute them.
With auxi, you can do easily.
First, SELECT your rows and columns and THEN open auxi's SMART BAR (CTRL + SPACE).
With the Smart Bar open TYPE "ADD ROW/COLUMN" OR "DELETE ROW/COLUMN".
And there you go, now you can easily add and remove rows or columns.
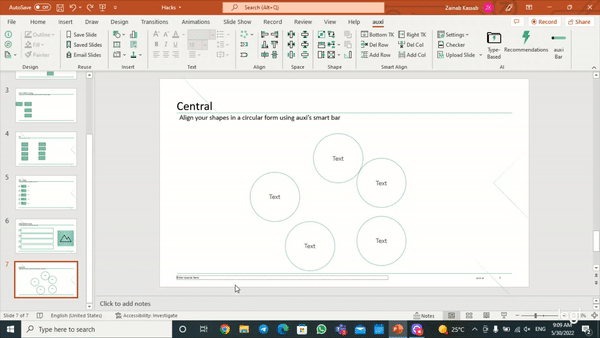
7. Align Central
Aligning elements in PowerPoint isn't always linear, but this auxi feature really helps you save time.
To align your elements easily around a center, give this a try.
SELECT your shapes, and from your auxi SMART BAR TYPE CENTRAL.
This open up a Radius pop up with allows you to easily manage your shapes with accurate alignment.
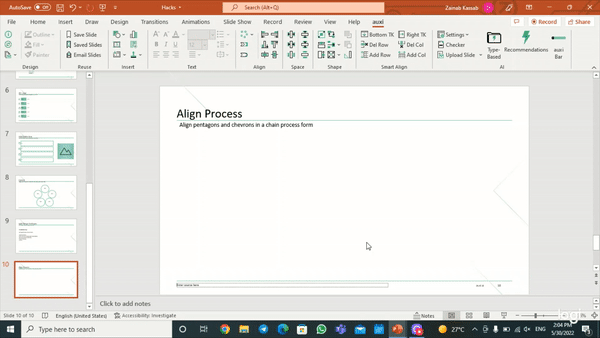
8. Align Process
One of your slides is likely talking about a process and if that is the case, you'd love this feature.
In order to align pentagons and chevrons in a chain process form without spending time on manually aligning the shapes and distributing them horizontally, do the following:
INSERT a pentagon or chevron, and place them in order (remember shortcuts 1 and 2 from earlier).
Now, SELECT them and choose ALIGN PROCESS from the auxi Smart Bar.
This will instantly align your process elements without you having to individually place them.
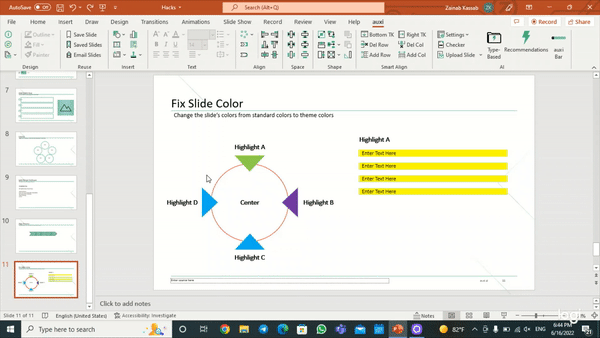
9. Fix Slide Colors
You know those times where your element has one color but you need to either copy/paste the same element or individually update the color for each? You don't have to do that with auxi.
Here is a simpler way to do it.
OPEN the slide you want to fix the colors on and FIND "FIX YOUR COLORS" in auxi's SMART BAR.
HIT ENTER and auxi will update your slide to your brand colors.
And finally, my all-time fav!
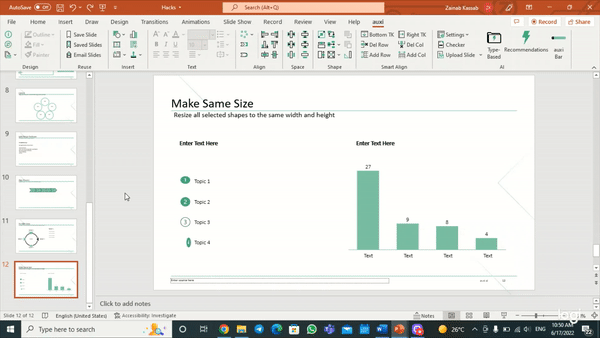
10. Make the Same Size
Now, for the final one on the list, and our favorite - resizing all selected shapes to the same width and height.
SELECT all the shapes you want to resize and from the auxi SMART BAR choose MAKE SAME SIZE. This will resize all your shapes.
NOTE: The first shape you SELECT, is your anchor shape - so be sure to choose the shape that you want all other shapes to look like.
PowerPoint is a powerful tool but with auxi, you can enhance it to make it more efficient helping you save a ton of time.
Interested in checking out auxi? Request a demo here.